How to use the built-in Recovery Mode for macOS
There are lots of reasons why you might want to boot into Apple’s Recovery Mode. Maybe you’re seeing the dreaded flashing question mark when you booted your Mac. Maybe you’re preparing to sell your old MacBook (say, to a certain company that will give you a good price for it. Wink, wink) and you want to wipe your drive. Maybe you need a fresh start after upgrading your SSD. Whatever your reason, we’ll show you the steps to to start the built-in Recovery Mode and explain all that it’s capable of.
Recovery Mode is a lot more than a simple way to restore your Mac to it’s factory state. It provides three separate options for recovery, allowing you quite a bit of flexibility in the event that you encounter a boot problem. The option you should choose depends on your situation.
- You can roll back to an earlier state using Time Machine.
- Reinstall OS X system files while preserving your personal files.
- Erase all contents of the internal storage and then install macOS with a clean slate.
Preparation
First things first. If you can, backup any files that might be important to you. It is very likely that you will lose them in this process.
The first thing you’re going to need to do is turn your computer off. There are different options, depending on why you want to enter recovery mode. You can choose to simply restore the exact OS that is on your computer already, or install the latest available version. Which option you choose is up to you but it will determine the first step for you. Some older computers (2010-2011 MacBooks and iMacs) need to download an EFI update in order to use internet recovery.
The Steps
- Push the power button then hold down the appropriate keys to enter recovery.
- In order to get the Mac OS already on your system hold Command+R
- To use the update version hold Option+Command+R
When it boots you will see a screen that looks like this:
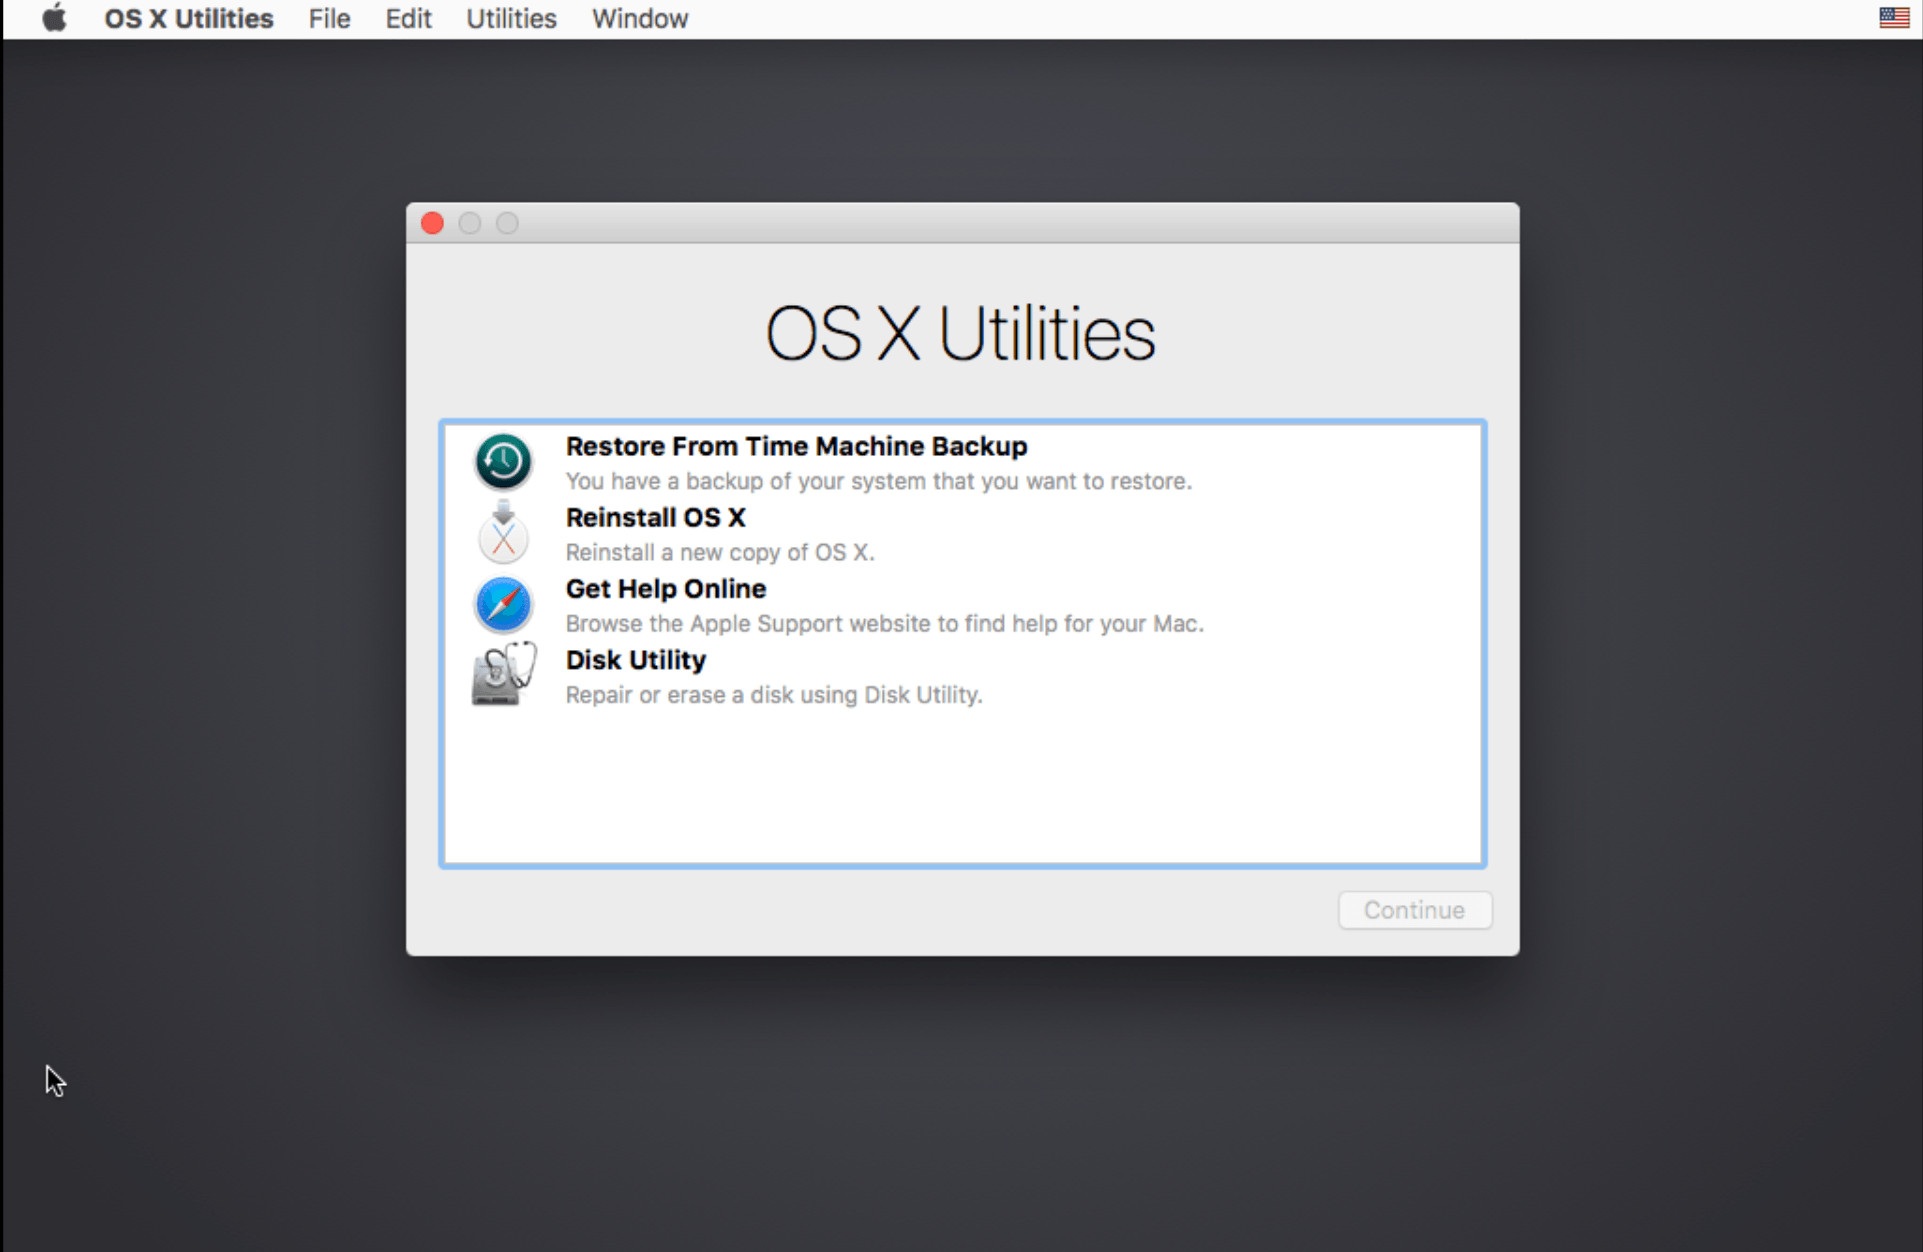 The macOS recovery boot menu
The next step in many cases is going to be to click on Disk Utility. Here you will find options to repair your drive or erase it. If you are having problems with your hard drive trying to repair is definitely the first step.
- Choose the “Disk Utility” option from the startup window.
- Click on your hard drive, which will be displayed in the upper left corner.
- CLick on “First Aid” from the options on the top of the window.
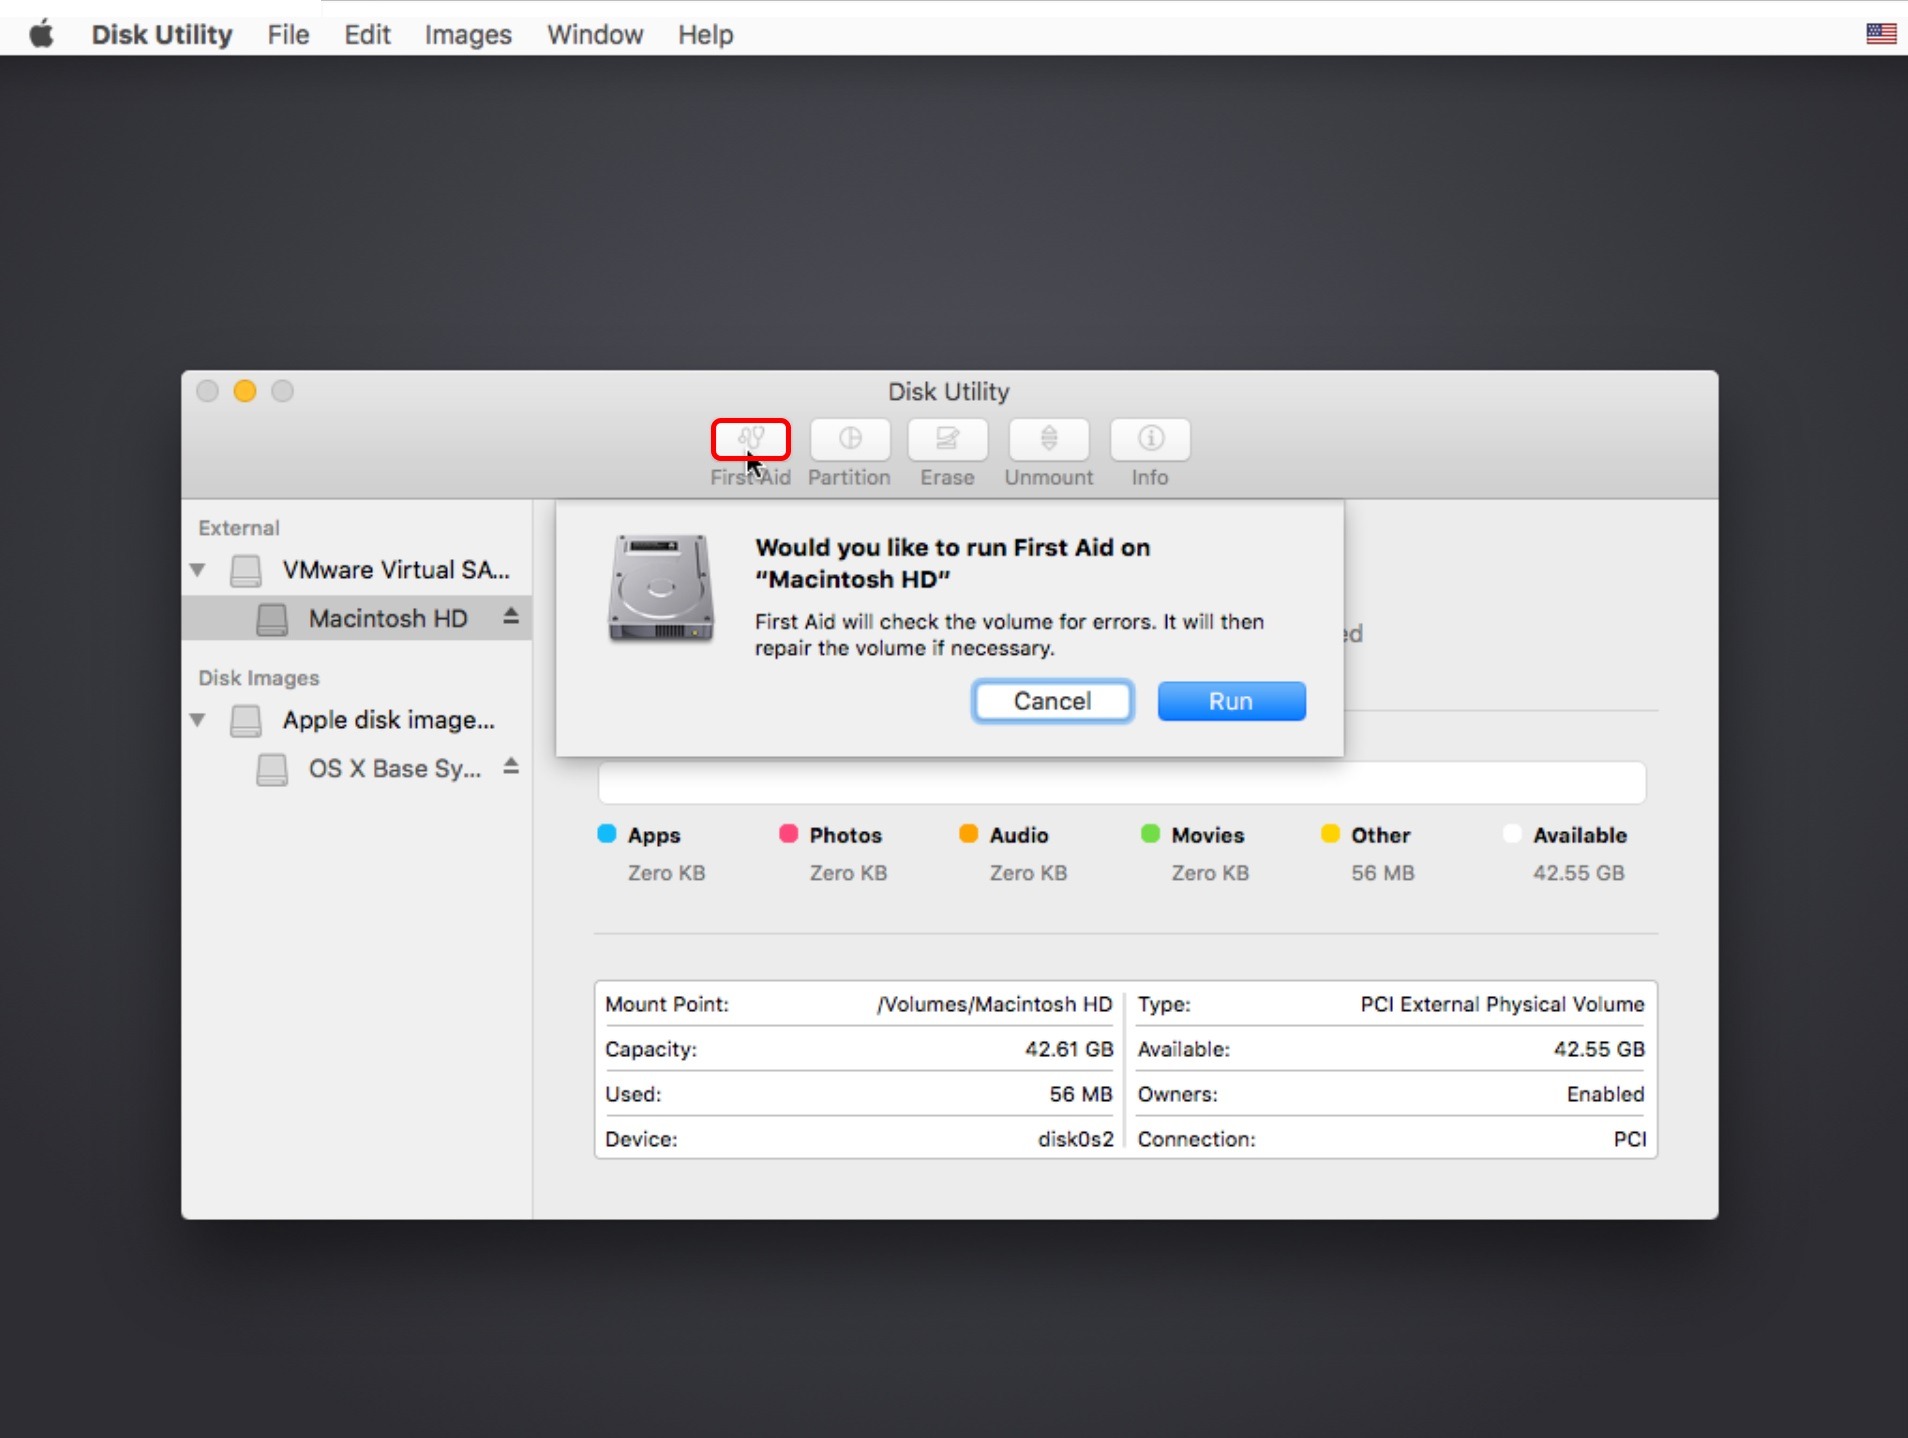
- Click “Run” and allow the Disk Utility to do its work.
- It will let you know if there are errors and if they were fixed.
Now is the time to decide if you are erasing your disk or not. If you are selling the computer, you’ll want to erase the disk so that you can wipe your personal information before handing it off to someone else. If you just had a problem booting into the OS and want to keep your files, but Disk Repair could not fix the problem, you may be forced to erase the disk. All data on the drive will be deleted, so hopefully you have a backup.
- Choose the Disk Utility from the startup window if you haven’t already done so.
- Click on your hard drive, which will be displayed in the upper left corner.
- Choose “Erase” from the options.
Show Your Love For This Post
About The Author

Recommended Posts
High Sierra and Testing RAM
With macOS 10.13, otherwise known as High Sierra, Apple introduced an ambitious EFI update. Several of the changes include: the introduction of the Apple File System, support for NVMe drives, and the usual batch of security updates. However, these EFI updates can cause some unwanted behavior when you test your Apple computer’s memory. At Beetstech, we use a long-time industry standard, MemTest86 to perform a comprehensive test of each computer’s RAM.
But never the type to blindly accept test results, strange testing outcomes led us to discover a bug in MemTest86 affecting computers running the new EFI firmware. In short, the newly updated EFI causes MemTest86 to incorrectly fail certain tests. But there is good news: while normal operation of MemTest86 is limited under these new EFI updates, we also discovered some simple workarounds for testing your Apple’s memory in MemTest86.
So let’s dive into how we discovered the MemTest bug, devised a reliable work-around, and get into some nitty gritty details of MemTest86 operation.
MacBook Air Power-On Pads – Location & Use
They go by “jumper pads”, “short-circuit pads”, “power pads”, and “power-on pads”. Whatever you call them, there are two bits of metal on your MacBook logic board that can force your laptop to boot up, even if the power button won’t do the trick.
OEM MagSafe Chargers vs Cheap Imposters: Teardown for Truth
Anywhere premium products are produced, there are unsavory folks trying to make a quick buck selling cheap knockoffs. It happens in every industry, from clothes to food to tech. But in recent years, counterfeit electronics have surpassed nearly all other categories of counterfeit goods by dollar value, and Apple, being the de facto high-end electronics manufacturer, makes for a prime target.
But you’d never be caught buying counterfeit electronics, because you can tell the difference, can’t you?
The Ultimate Guide to Apple’s Proprietary SSDs
Remember the good ol’ days of carrying a spare battery, upgrading your own RAM, maybe even adding a second hard drive? If you’re an Apple user, those luxuries may be behind us, but upgrading your own solid state drive is still a privilege the Apple overlords allow us to have, for now that is.
Despite retaining the ability to upgrade your own SSD, ever since Apple introduced their proprietary “blade” SSDs in 2010, the task hasn’t been as simple as it once was. Apple talks up read and write speeds, but they rarely dive into the nitty gritty details of the technology behind the SSDs they use — drives specially designed only for Apple computers.
After countless questions, both from customers and our own staff, we decided to start our own investigation into the hardware involved. You have to be a bit of a private eye to uncover the secrets behind these drives, and the deeper we looked, the more surprises we found.
Your Hard Drive Cable Is A Ticking Time Bomb
Owners of a Unibody MacBook Pro laptop are probably already aware that failure of the hard drive flex cable is a common issue. While it affects just about the entire Unibody lineup, the Mid 2012 MacBook Pro 13″ (Model A1278) is especially prone to this type of failure.
What is it that makes the Mid 2012 release special in this regard? A design flaw in the flex cable that seems to be compounded by the properties of the aluminum housing.
Our repair services department noticed this issue when they’d replace a bad cable, only to have the customer return a few months later with another bad cable. And possibly again with yet another bad cable. It didn’t matter if we used a used cable or a new cable in the replacement. Customers kept returning with the same persistent issue. We had to figure out what was causing the issue and find a solution.